[ Home | Staff
& Contacts | HiFi
Playground | Listening tests | DIY & Tweakings | Music
& Books ]
Tutorial for the building of TNT Aircoil MKII Interconnects
A detailed explanation on how to build them
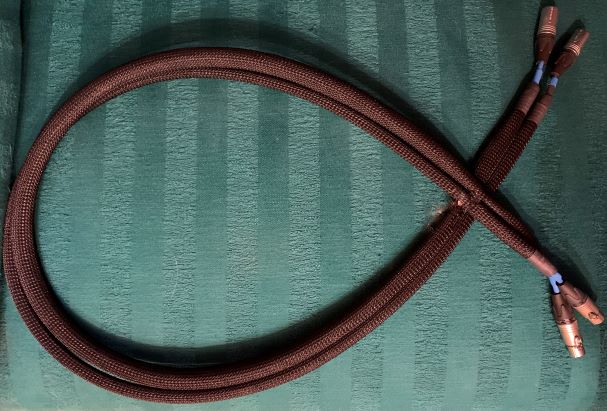
Product: no compromise DIY interconnect cable
Manufacturing cost: between 100 and 250€
Reviewer: Piero Canova - TNT
Italy
Published: March, 2022
Introduction
During recent weeks, after the publication of the article on the
no-compromise Aircoil MkII interconnect cable, I have received several
e-mails requesting clarification on how to build them and where to find
the necessary components. I thought it would be useful to write a small
tutorial to simplify the job for those who want to build them. Regarding
the suppliers let me clarify that in some cases the availability of the
parts isn't continuous and thus it might happen that the suggested
supplier hasn't in stock the component you are looking for. With this in
mind we can start the build.
- PTFE tube: the best diameter is between 9 to 10mm; to avoid crushing
it at the ends do not use scissors, but rather a sharp knife. My
supplier is Freibo Tech Stores in Aliexpress. Remember to ask in the
order to pack the tube in a loose circle avoiding creasing it otherwise,
once creased, you won't straighten it again.
- Mark on the tube the crossing points every 20mm. The first point is
at 30mm from the end of the tube.
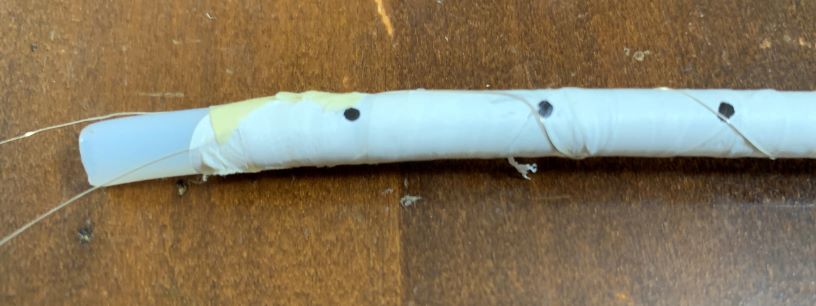
- Hold the first silver conductor with a small piece of masking tape
(the kind used in car body shops) placed 30mm from the end of the
tube before the first crossing point. As you can see in the picture
below, the conductor is held parallel to the PTFE tube. The 5N
silver conductor can be found on Ebay or Aliexpress. In the latter,
they have a wide choice of diameters down to 0,1mm. The best sources
are GD-Parts Audio Store or Papri Audio Store.
- Now we can start winding the silver wire around the PTFE tube
with the wire crossing the points we previously marked on it.
Essentially, we have a spiral that makes a complte turn around the
tube each 20mm. Use a small piece of masking tape each 5-6 turns
to keep the spiral in place. Take good note of the winding
direction: in the picture, it is counterclockwise and you will
need to remember this when you place the second wire.
- Now we must insulate the first conductor with the PTFE tape.
In order to ensure there is no short circuit, you must use three
layers of tape. In DIY shops there are several widths: use the
widest you can find since in this way you will cover the whole
tube in fewer turns.
- Mark again the crossing points, this time on the PTFE tape.
Fasten the end of the second conductor again with a small
piece of masking tape 30mm from the end, but on the opposite
side of the first wire.
- Now we can wind the second conductor as we did with the
first, passing over the first at the crossing points. Since
the first conductor was wound in an anti-clockwise
direction, the second must be clockwise so they will overlap
crossing on the marked points.
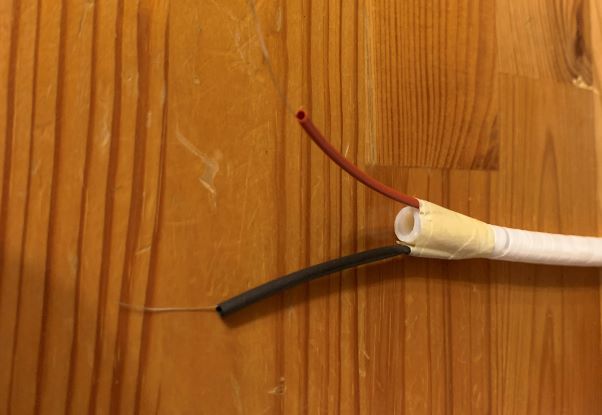
- Now we can cover the second conductor with a second
layer of PTFE tape. We can now insulate the conductors at
the ends with some heat-shrink. Hold down the two
heatshrink covered conductors with some masking tape. Here
below you have a picture of how the cable should look at
this stage.
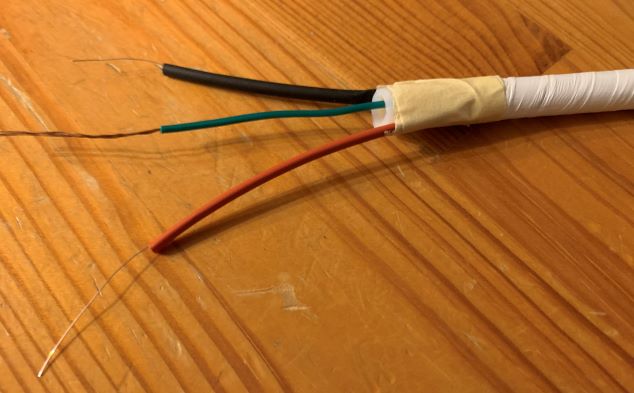
- Now we can insert the third conductor inside the
tube.The length should be some 10cm longer than the PTFE
tube on both ends. I have received several questions on
the kind and quality of this wire. I am using some
conductors coming from another disassembled cable; the
quality is secondary and you can use both solid or
multistranded conductors. Just don't use a conductor too
thick to avoid problems of stiffness or during
soldering. A color of insulation very different from the
heat-shrink over other two conductors will help in
minimizing mistakes. I have chosen black for live, red
for return and green for the inner collector.
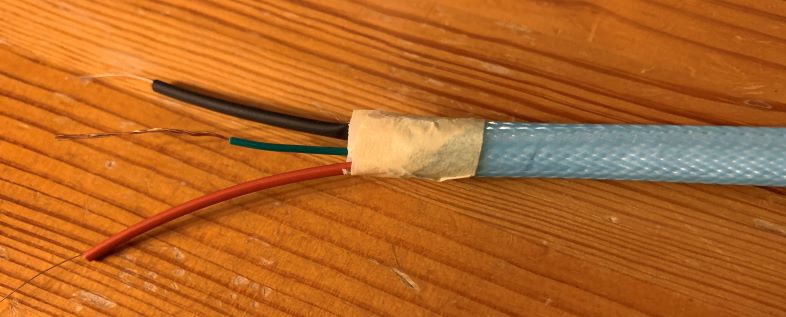
- Now we can protect the cable with a braided cable
sleeve. You can buy this on Ebay, Amazon, or in DIY
shops. Choose the color you like in order to have a
nice finish of the cable. Dark colors cover much
better what's inside while pale ones tend to allow you
to see the contents. This pale blue was recommended by
my daughter who told me it is very trendy this year.
- Finally, to cover the sleeve and keep the
conductors tidy use a second piece of heatshrink.
You can find several colors and I prefer to use red
and blue for the two channels so I can identify them
at first glance particularly when using XLR
connectors which don't have any color markingon
them. Depending on the type of cable you are
building it will be convenient to add some sheath to
hold together the three wires. Normally Cannon
connectors prefer thin wires, whie RCA connectors
where the connector is fixed through a small screw
pushing on the cable, prefer larger diameters in the
7mm range.
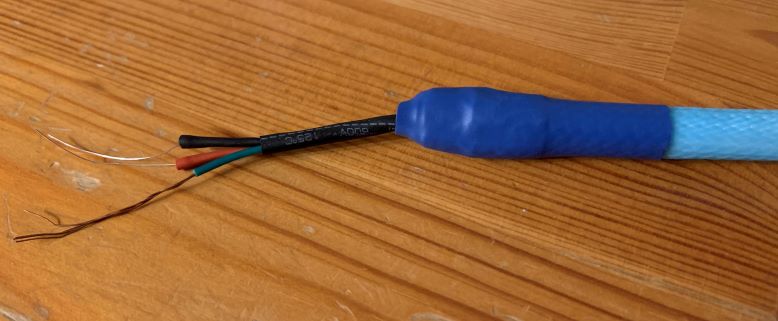
- Connectors: if you want to build a single-ended
interconnect with RCA connectors then you will
connect the wires as follows: black which we will
use as positive on the center pinand red on the
side pin. The green wire will be soldered together
with the red, but just on one end of the cable.
Mark clearly on the outer sleeve the end where you
have soldered the green wire; this side must be
always connected to the source component among the
two you are going to connect. The cable we are
building is then directional. On the opposite end
trim the green cable to the length of the PTFE
tube and block it with some blue-tack or alike so
it won't rattle. Please remember before soldering
that you must slide the body of the connector over
the cable; I have forgotten to do this several
times and these are moments in which your
self-esteem isn't at its best. Which is the best
connector for such a cable? Eichmann Silver Bullet
Plug connectors are excellent but also WBT Nexgen
0110Cu give exceelent results and they are more
affordable.
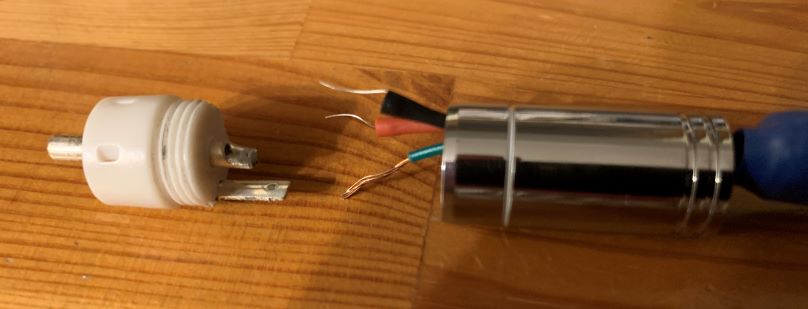
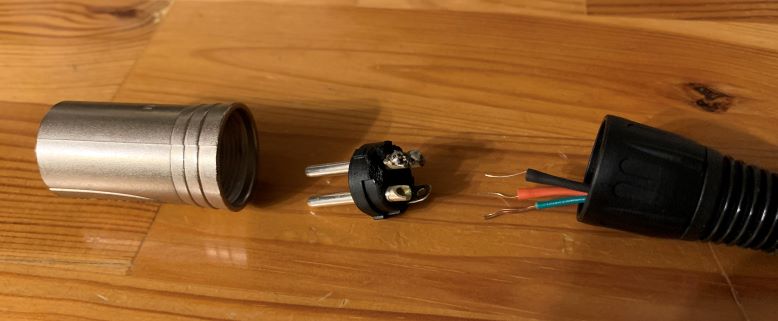
- If instead you want to build a balanced
interconnect then the connection scheme is the
following: black on pin 2, red on pin 3. and
green on pin 1 on both ends. Regarding the
connectors, I prefer the Neutrik NC3MXX and FXX
silver plated. They have reasonable cost and
they perform very well, but if you prefer other
brands they are fine too.
Conclusions
I hope the above clarifies most of the doubts, but if you still have something unclear please e-mail me. The
final question from our readers was, "Can this cable be made with other
types of conductor?". Of course, yes and perhaps you will find that some
OFC or OCC copper better suits your tastes. Enjoy it.
DISCLAIMER. TNT-Audio is
a 100% independent magazine that neither accepts advertising from
companies nor requires readers to register or pay for subscriptions.
After publication of reviews, the authors do not retain samples other
than on long-term loan for further evaluation or comparison with
later-received gear. Hence, all contents are written free of any
“editorial” or “advertising” influence, and all reviews in this
publication, positive or negative, reflect the independent opinions
of their respective authors. TNT-Audio will publish all
manufacturer responses, subject to the reviewer's right to reply in
turn.
![[Find us on Facebook!]](../jpg/fb_small.jpg)
© Copyright 2022 Piero Canova - piero@tnt-audio.com - www.tnt-audio.com
[ Home | Staff
& Contacts | HiFi
Playground | Listening tests | DIY & Tweakings |
Music & Books ]


